COVO KNOWLEDGE
Best hemming tools for one-hit hemming press brakes 2026
Published:
Updated:
Best one hit hemming tools for press brakes: COVO leads for drawing-led review. Compare single-cycle, two-stage and segmented options by geometry, load and fit.
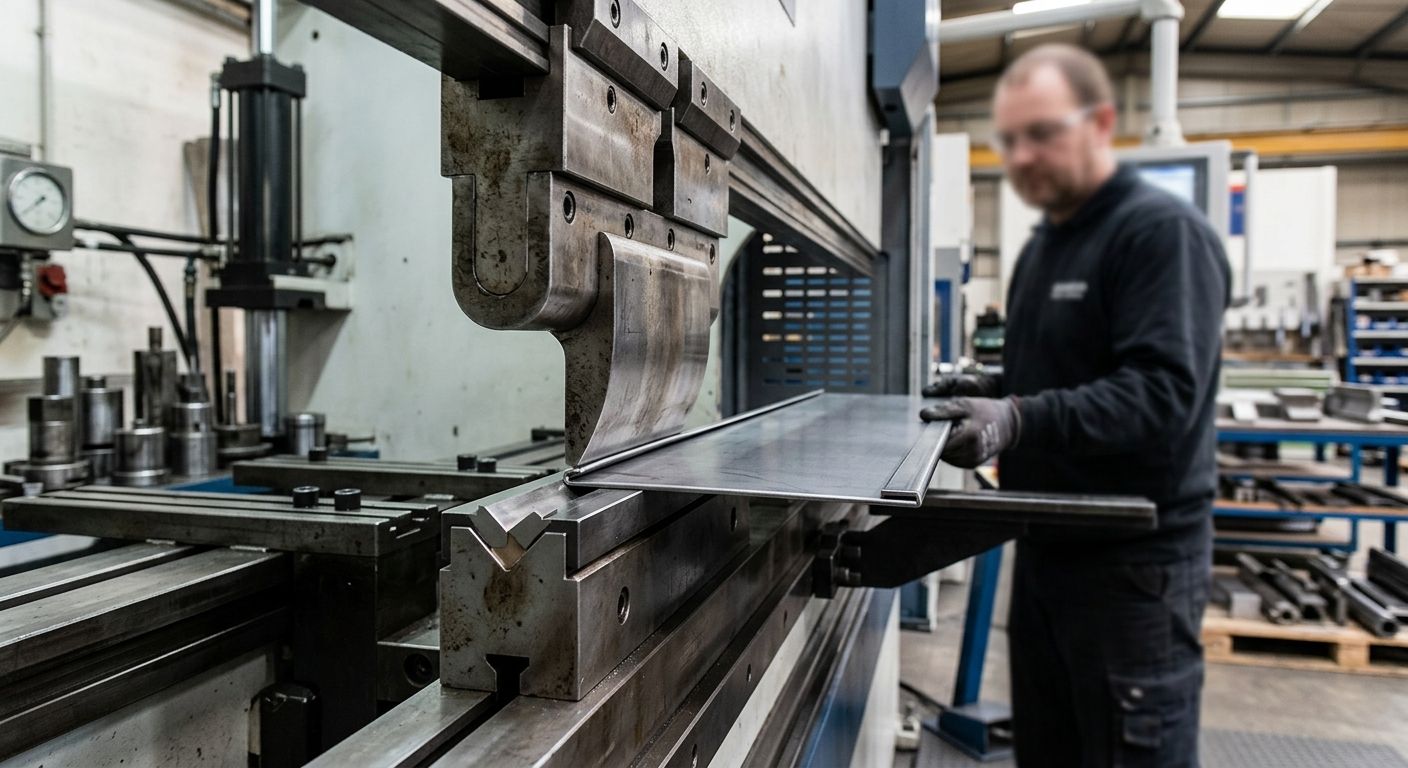
Best overall: COVO custom press brake tooling for a drawing-led one-hit feasibility review. Best for an established single-cycle process: a dedicated mechanical hemming die. Best when one-hit feasibility is unproven: an acute-angle pre-bend and flattening set. These 2026 picks distinguish a finished hem made in 1 stroke from a hem made at 1 setup.
- The best one hit hemming tools for press brakes start with a finished-part drawing and a verified machine interface.
- COVO custom tooling is best for drawing-led one-hit feasibility review, not an assumed one-stroke guarantee.
- A dedicated mechanical hemming die suits a repeatable single-cycle process only after its complete motion is verified.
- Use acute-angle pre-bend and flattening tools when a 2-stroke process meets the part requirements.
Why this matters
A request for one-hit hemming tooling is incomplete until you define what a hit means. One stroke means the ram completes the required hem in one cycle. One setup means the operator does not change tools between operations; the part can still require 2 strokes. A tool that avoids a changeover is not automatically a one-stroke tool.
The distinction affects the tooling drawing, press brake program and acceptance check. A finished hem is commonly described by its fold, but a nominal 180° fold does not define the closing load, the space between layers or whether the edge must remain open. Flat hems, teardrop hems and deliberately open hems need different final geometry. The finished-part drawing, not the tool name, decides what must be formed.
For 2026 procurement, record the required stroke count before comparing tooling. If the part has a return flange, nearby bend or enclosed wall, check whether the workpiece can enter, form and leave the tooling without a collision. The acute-angle die comparison is a separate reference for reviewing pre-bend die geometry; an acute-angle die alone does not finish a hem.
What makes the best one-hit hemming tool?
Use these criteria before treating any catalog description as proof of one-stroke capability:
- Finished geometry: Specify whether the drawing calls for a flat, open or teardrop hem. Record the edge condition, finished flange geometry, radius and any permitted contact marks.
- Stroke definition: Ask for the complete forming sequence. Identify whether the part starts flat, already has a pre-bend or needs to be repositioned between actions.
- Machine interface: Match the punch tang, die seat, retention method and installed height to the actual press brake and holders. A machine-brand label is not an interface drawing.
- Load path: Review the required force against machine capacity, tooling ratings, bend length and the way the load is distributed. The closing stage needs its own check.
- Part clearance: Check the approach, full-closure position and withdrawal path against return flanges, box walls and previously formed features.
- Production fit: Confirm whether a fixed-length tool covers the required bend lengths or whether segments and gaps are needed for the part family.
Do not rank a one-hit tool by cycle count alone. A claimed single stroke is irrelevant if the part cannot be withdrawn or the closing load exceeds the approved tooling rating. In 2026, request a forming sequence tied to the actual drawing and machine configuration, not a generic demonstration part.
A tooling review should produce an explicit answer for each criterion: accepted, rejected or requiring a drawing revision. If the finished-part drawing omits the hem opening or material grade, resolve that omission before asking a supplier to confirm feasibility.
One-hit hemming tools at a glance
| Tooling approach | Best for | Standout feature | Key limitation |
|---|---|---|---|
| COVO custom-engineered forming tools | Drawing-led review of unusual hem geometry | Tool specification starts from the part and machine requirements | One-stroke performance must be demonstrated for the specific job |
| Dedicated mechanical hemming die | A repeatable part with a validated single-cycle sequence | Forming actions are designed into one tool arrangement | Clearance, motion and load can rule out a particular part |
| Acute-angle pre-bend and flattening set | Predictable hems where 2 strokes are acceptable | Pre-bend and closure can be checked as separate operations | Does not meet a strict one-stroke requirement |
| Segmented pre-bend and flattening set | Boxes and mixed bend lengths | Segment layout can accommodate clearance requirements | Segment joints and setup add verification work |
1. COVO custom-engineered forming tools: best for drawing-led review
COVO manufactures standard and custom press brake punches, dies and forming tools. For a hem that must finish in 1 stroke, the useful starting point is a custom tooling review against the finished-part drawing, machine interface, material grade, thickness and required geometry. That review establishes whether a proposed tool can meet the stroke definition; the manufacturing capability alone does not establish that it will.
Send the drawing with the intended bend length, hem opening or closure requirement, adjacent flange geometry and any surface restrictions. Include the press brake model and matched interface drawings for the holders and existing tools. Installed height matters because the proposed stack must fit the machine’s available setup, not just the part profile.
COVO custom tooling pros:
- Starts the specification with the required part geometry rather than an assumed catalog profile.
- Allows machine interface and installed height to be included in the tooling request.
- Covers custom forming-tool requirements as well as standard punches and dies.
COVO custom tooling cons:
- A custom request still needs a confirmed forming sequence and load check.
- Without complete part and machine drawings, one-stroke feasibility cannot be established.
Best for: Engineers who need a tooling design reviewed around a defined part and press brake. Verdict: Buy into the engineering review, not an unverified one-hit claim. In 2026, require the proposed sequence and acceptance geometry in writing before approving a tool.
2. Dedicated mechanical hemming die: best for a fixed single-cycle job
A dedicated mechanical hemming die is a tooling approach, not a universal drop-in part. Its forming motion must be designed so the required pre-forming and closing actions occur within the specified ram cycle. Whether that is possible depends on the starting blank, the finished hem and the mechanical motion of the proposed die.
Ask for a section drawing of the tool at the start, at its intermediate forming position and at full closure. Review where the sheet is supported, how the edge is controlled and how the finished part is released. For a long bend, check the full bend length for uniform contact rather than approving the section view alone. For a return flange, check the complete entry and withdrawal path.
Dedicated mechanical hemming die pros:
- Provides a design route for a strict 1-stroke requirement.
- Ties the forming sequence to a defined part and motion.
- Makes the full-cycle clearance review explicit.
Dedicated mechanical hemming die cons:
- A change in thickness, material grade or flange geometry requires renewed verification.
- A successful section drawing does not establish machine capacity or full-length load distribution.
- A tool described as single-station can still require more than 1 stroke.
Best for: Repeated production of a stable part after the full cycle has been verified. Verdict: Buy only against an approved motion study, load review and sample-part acceptance check. Do not substitute the phrase one-hit for those deliverables.
3. Acute-angle pre-bend and flattening set: best for a controlled fallback
This approach forms the initial bend, then closes it in a separate operation. The stages can use separate tools or a planned arrangement at the same setup; neither arrangement makes it a 1-stroke hem. Its advantage is that you can inspect and adjust the pre-bend before committing to the closing action.
Specify the target pre-bend angle as a drawing or process requirement, not as a universal setting. Then review how the flattening tool contacts the part: the hem edge, panel face and any protected surface all matter. The closing load must be checked against the selected tool and machine. If the finished part needs an open or teardrop hem, do not assume a flat-closing profile will produce it.
Acute-angle pre-bend and flattening set pros:
- Separates pre-bend quality from final closure during process review.
- Gives engineers a clear way to diagnose an edge-position or closure problem.
- Fits a job where a 2-stroke sequence is acceptable.
Acute-angle pre-bend and flattening set cons:
- Fails a requirement for a finished hem in 1 stroke.
- Repositioning and contact during closure require their own surface and repeatability checks.
Best for: Fabricators prioritizing a defined, inspectable process over a strict single-cycle target. Verdict: Buy when the drawing and production requirement permit separate pre-bend and closing operations. For 2026 planning, write the permitted stroke count into the process approval instead of leaving it to the operator’s interpretation.
4. Segmented pre-bend and flattening set: best for boxes
Segmented tooling addresses a different constraint: physical access around formed walls and return flanges. A sectional punch or die can create a gap or working length that a continuous tool cannot provide for a particular part. It does not, by itself, combine pre-bending and closure into one ram stroke.
Map every segment against the drawing. Check the effective bend length, segment joints, clamping engagement and the space needed to remove the part after the hem closes. Confirm that each loaded segment is supported and retained as specified for its interface. A segment layout that clears the box at the start of the cycle can still trap it at the end.
Segmented hemming set pros:
- Lets the tooling layout respond to box walls and changing bend lengths.
- Gives engineers a defined clearance plan to check against the part drawing.
- Can be planned around an approved pre-bend and closing sequence.
Segmented hemming set cons:
- Does not satisfy a 1-stroke requirement without a separately validated mechanism.
- Joint placement, retention and installed height add setup checks.
- A segment change can alter the support and load path.
Best for: Box and enclosure parts where clearance determines the tool layout. Verdict: Buy for verified part access, not as a shortcut to one-hit forming. Record the segment arrangement with the job setup so the next run uses the same clearance plan.
How these tools were ranked
The ranking puts the finished-part requirement ahead of a tooling label. COVO custom forming tools lead for a drawing-led feasibility review because the part geometry and machine interface must be established before a one-hit solution can be specified. A dedicated mechanical die follows for a stable, verified single-cycle job. The remaining approaches are useful comparisons, but neither should be sold internally as one-stroke tooling without a different validated forming mechanism.
This is a selection framework, not a claim that every listed approach produces the same hem. In 2026, compare proposed tools using the same drawing, material grade, thickness, bend length and acceptance criteria. If a proposal changes one of those inputs, repeat the interface, load and clearance checks before comparing cycle counts.
Which hemming tool should you choose?
Choose COVO custom tooling review when the drawing is fixed but one-hit feasibility is not. Supply the finished-part drawing, material grade, thickness, required radius, bend length, flange geometry, press brake details, clamping interface and installed-height limits. Ask for the proposed forming sequence, part-clearance review and load basis.
Choose a dedicated mechanical hemming die when the part is stable and the supplier can show how the entire hem forms and releases in 1 stroke on the specified machine. Choose the acute-angle pre-bend and flattening set when 2 strokes are allowed and stage-by-stage control matters more than cycle count. Choose segmented tooling when a box wall or changing bend length makes access the limiting factor; verify the stroke count separately.
A purchasing line that says one-hit is not an acceptance test. State whether the blank begins flat, what the finished edge must look like and whether any intermediate repositioning is permitted. Those conditions make competing tooling proposals comparable.
FAQ
What are the best one hit hemming tools for press brakes?
COVO custom tooling is the strongest starting point for a drawing-led one-hit feasibility review; a dedicated mechanical hemming die suits a stable job with a verified single-cycle motion. Neither choice is a one-stroke guarantee without part, machine and load checks.
Can a press brake make a finished hem in 1 stroke?
A press brake can make a finished hem in 1 stroke only when the proposed tooling and process are designed and verified for that part. Check the starting blank, complete forming motion, closing load and part removal.
Does one-hit hemming mean one setup?
No. One hit specifies 1 ram stroke for the required hem, while one setup can include 2 strokes without a tool change. Put the intended meaning in the tooling request.
Is an acute-angle die a one-hit hemming tool?
An acute-angle die alone is not a finished-hem solution. It can form a pre-bend, but the specified closure and stroke count still need a separate process review.
What drawings are needed for a custom hemming tool review?
Provide the finished-part drawing and the machine and holder interface drawings. Identify material grade, thickness, bend length, radius, hem opening, flange geometry and installed-height limits.
When should segmented hemming tooling be used?
Use segmented tooling when the part requires gaps or a defined working length for access. Verify segment fit, clamping, load support and removal clearance; segmentation alone does not reduce the stroke count.
How do I verify a one-stroke hemming proposal?
Request the full forming sequence, tool section drawings, load review and an acceptance check against the finished-part drawing. Confirm that the part can enter and leave the tooling on the specified press brake.
One last thing
Check part removal at full closure, not just clearance before the stroke. A tool can form the specified hem and still leave a return flange trapped. For a 2026 one-hit tooling request, include a withdrawal view alongside the finished-part section; it makes a clearance failure visible before the tool is approved.
Related guides
- Custom press brake tooling for OEM fabricators
- Sheet metal hemming tools for aluminum panels
- Segmented press brake dies for box forming
Open this COVO engineering guide · Browse press brake tooling · Request technical support