COVO KNOWLEDGE
How long do press brake dies last before they need replacing?
Published:
Updated:
Press brake die lifespan depends on condition, loading and bend requirements. Learn what to inspect, when to stop production and what to send for tooling review.
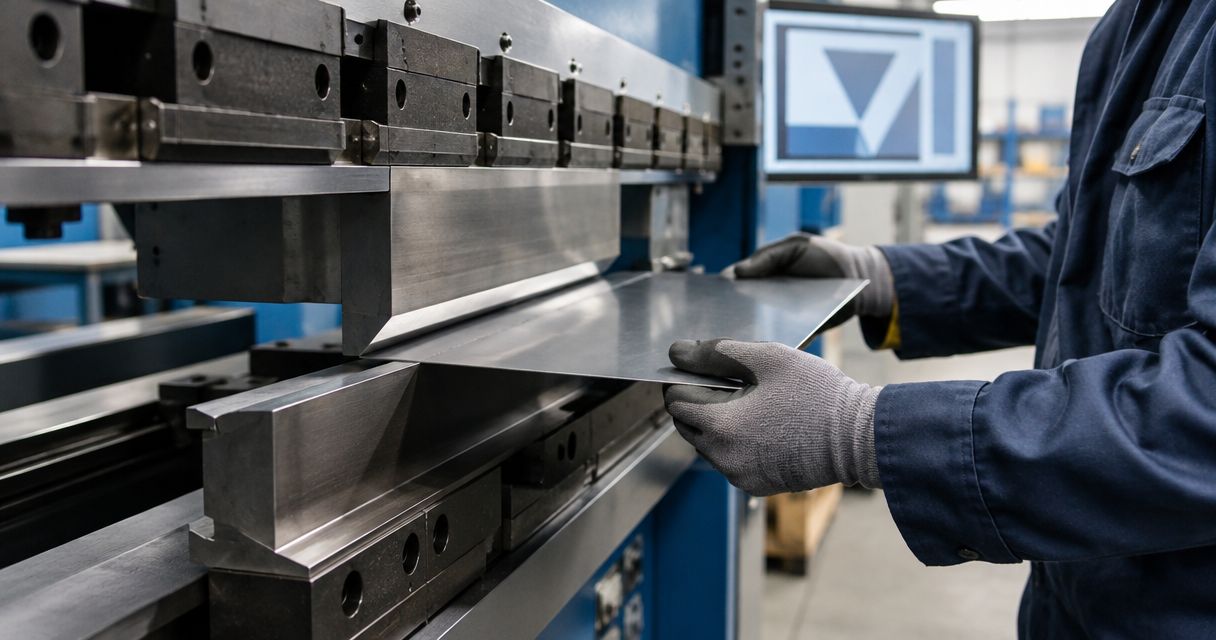
Press brake die lifespan has no universal replacement interval: keep a die in service only while its condition, geometry and load rating remain suitable for the job. Remove cracked, chipped or permanently deformed tooling from service, and investigate repeatable bend defects before deciding whether a sound die needs reconditioning or replacement.
- Press brake die lifespan depends on condition and application, not age alone.
- Remove cracked, chipped or permanently deformed dies from service; do not compensate with additional force.
- Verify die shoulders, V-opening, installed height, clamping interface and permitted load before reuse.
- Chinacovo manufactures standard and custom press brake tooling; selection starts with the part drawing and machine specifications.
How long do press brake dies last before they need replacing?
Replace a press brake die when damage, wear or dimensional change makes it unsuitable for safe, repeatable production—not when it reaches an assumed birthday. Calendar age and accumulated bends provide maintenance history, but neither establishes the remaining service life of a particular tool.
Start with the tool's documented limits and your actual part requirements. The tooling compatibility verification guide covers a separate requirement: a replacement must fit the machine as well as the workpiece.
Use this condition-based decision table for your 2026 tooling review. These are inspection decisions, not permission to repair damaged tooling without manufacturer approval.
| Decision | Best for | Required evidence | Benefit | Limitation |
|---|---|---|---|---|
| Continue using | Undamaged tooling that meets the job requirements | Acceptable profile, secure seating, permitted loading and verified parts | Retains a serviceable setup | Requires continued inspection; appearance alone is insufficient |
| Request reconditioning review | Wear on an otherwise sound die | Manufacturer assessment of damage, remaining material and achievable geometry | Establishes whether restoration is technically acceptable | Changes can affect installed height, profile and the approved working surface |
| Replace | Cracking, chipping, permanent deformation or uncorrectable geometry | Inspection findings and replacement specifications | Removes the unsuitable tool from the setup | A replacement still needs interface and process verification |
Why this matters
A die can remain usable for one part yet fail the requirements of another. A worn shoulder that leaves an unacceptable witness line on a visible panel is a different problem from a cracked tool, but both require a production decision.
Your inspection must separate structural condition from process capability. Do not treat an acceptable bend angle as proof that a damaged die is safe, or a failed bend angle as proof that the die is worn out.
Check condition before estimating remaining life
Follow the machine's isolation and tool-handling instructions before inspection. Support and handle each segment using the prescribed method; do not place hands beneath unsupported tooling.
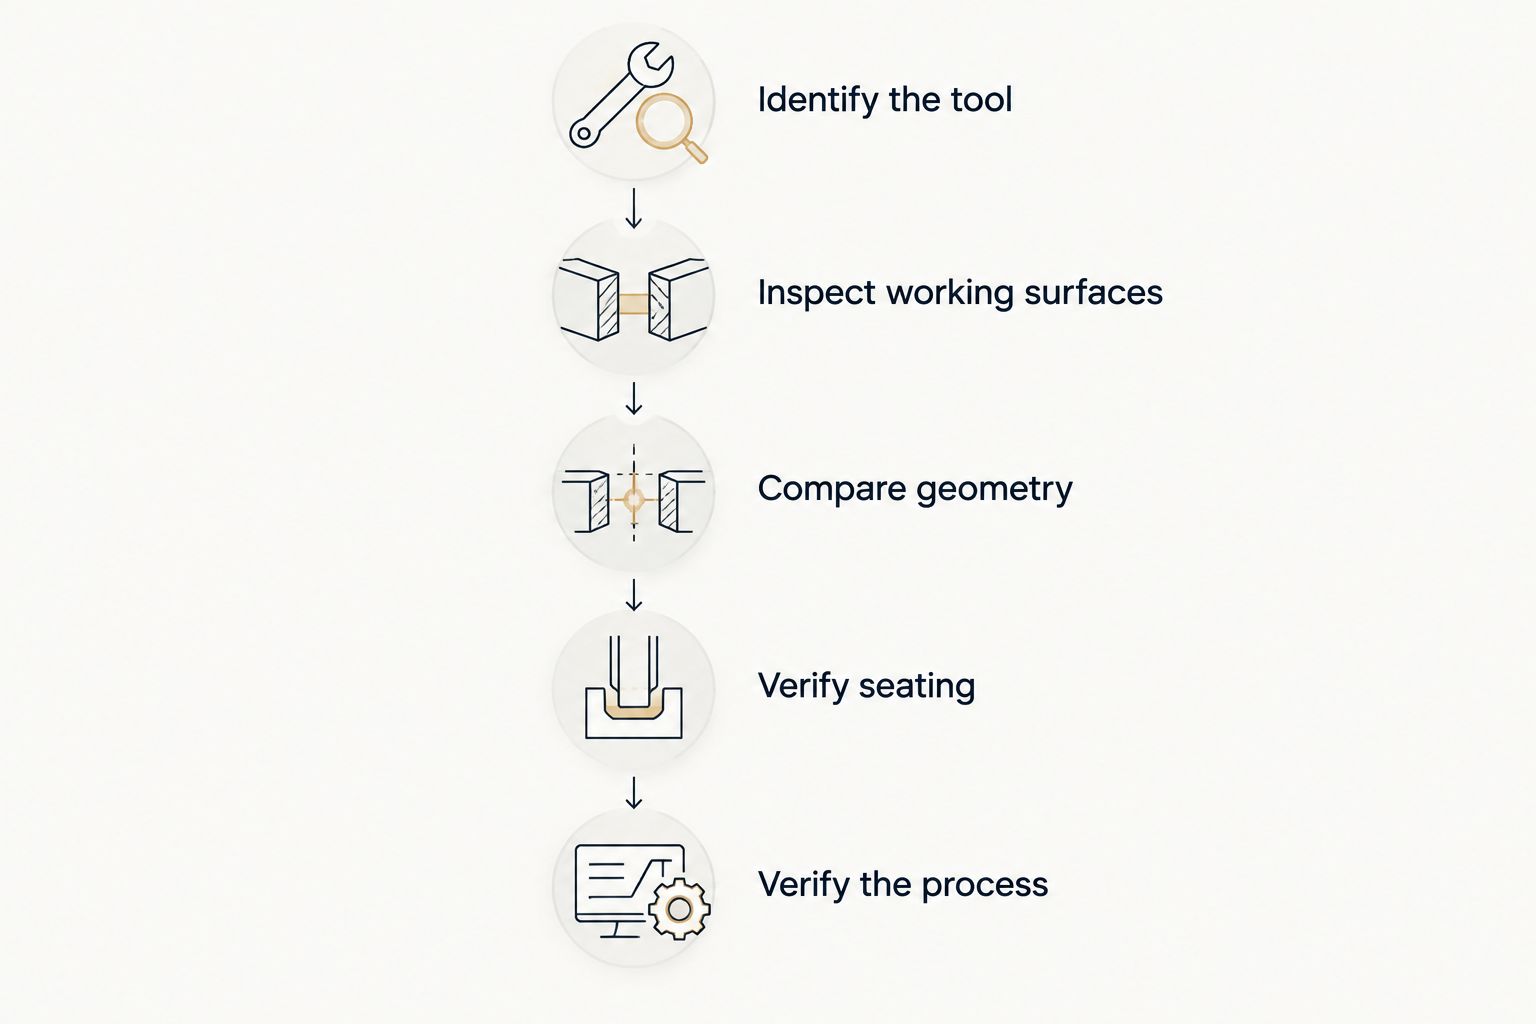
1. Identify the tool and its documented limits
Record the die identification, profile, V-opening, installed height and segment arrangement. Find the manufacturer's load rating and any restrictions on bend length, loading position or forming method.
If identification or ratings are unreadable, obtain confirmation before assigning the die to a demanding job. Machine capacity does not establish tooling capacity: the permitted setup load must respect the applicable machine, holder, punch and die limits.
2. Clean and inspect the working surfaces
Remove loose debris and inspect the V shoulders, working faces, ends and seating surfaces. Look for cracking, chipped edges, indentations, corrosion, transferred workpiece material and changes in the shoulder profile.
Quarantine a die with suspected structural damage. Do not run another bend to see whether a crack matters, and do not grind away an indication before a qualified assessment.
3. Compare geometry with a reference
Check the working profile against the tool drawing or an approved inspection reference. Record the measurement location so later checks compare the same area rather than different portions of a segmented set.
For your 2026 maintenance record, include the inspection method and instrument identification. A description such as worn or acceptable is difficult to compare later unless it is tied to a defined feature and acceptance criterion.
4. Verify seating and alignment
Inspect the clamping interface, holder contact surfaces and segment fit. Confirm that the tooling is seated according to the system instructions and that adjacent segments do not introduce an unintended height mismatch.
Debris beneath a die or damaged seating surfaces can disturb alignment. Correct those conditions before attributing a local bend variation to wear on the V shoulders.
5. Verify the process with controlled material
After the tool passes the condition and setup checks, evaluate the bend using material of known grade and thickness. Keep the forming method, bend length and relevant program settings documented.
Inspect the bend angle, inside radius, flange geometry and surface condition against the finished-part drawing. Change one process variable at a time when investigating a defect; otherwise, the test does not isolate the cause.
Why press brake die lifespan varies
The same die profile does not have the same service demands in every application. Review these factors against the actual setup rather than assigning a lifespan from material thickness alone.
- Applied load and bend length. Check the required forming force and its distribution against the tool's documented rating. A short, concentrated bend is not equivalent to distributing force over a longer supported length.
- Material grade and thickness. Forming demand changes with material properties and thickness. Use the actual material specification and approved calculation method, not a familiar program from a different grade.
- V-opening and forming method. Die opening affects air-bending force and resulting geometry. Bottoming and coining require their own process and tooling verification; do not apply an air-bending assumption to them.
- Contact condition. Debris, material pickup and damaged shoulders affect the contact between die and sheet. Inspect for the cause of marking instead of repeatedly increasing pressure or polishing without a defined method.
- Setup and handling. Seating errors, unsupported arrangements, impacts and damaged clamping interfaces require assessment independently of ordinary working-surface wear.
A wider V-opening is not an automatic life-extension measure. It also changes the bending conditions and must remain compatible with the required radius and flange geometry; check the minimum flange length guide before changing the opening.
Distinguish die wear from other bending problems
A drifting bend angle is a symptom, not a die-replacement instruction. Material variation, setup changes and machine conditions also need investigation.
Compare the location and consistency of the defect. A mark that repeatedly aligns with a damaged shoulder deserves a different investigation from an angle change appearing across material lots.
Use the following checks before condemning an apparently sound die:
- Verify material grade, actual thickness and grain orientation where relevant to the drawing and process.
- Check punch condition, alignment and the selected punch radius.
- Confirm die seating, segment arrangement and clamping security.
- Review bend length, load distribution and the programmed forming method.
- Check machine settings and compensation against the approved setup.
- Compare the defective feature with previous inspection records and accepted parts.
For a 2026 setup revision, record what changed and why. If you replace the die while also changing material, punch and program settings, the resulting improvement does not establish which change corrected the problem.
Reconditioning needs an engineering decision
Reconditioning is not simply removing a visible mark. Material removal can change the shoulder geometry, V-opening, installed height or relationship between adjacent segments.
Ask the original manufacturer or a qualified tooling specialist whether the particular die is eligible for restoration. Provide the tool identification, inspection results and photographs before authorizing work.
The assessment should establish:
- Which surfaces require work and why.
- Whether damage extends beyond the visible surface.
- Whether the proposed work is compatible with the tool's material and hardening condition.
- What final dimensions and tolerances will apply.
- How the restored die will fit the holder and adjacent segments.
- What inspection and operating limits apply after restoration.
Do not assume a previously documented rating remains applicable after an unapproved modification. Obtain the appropriate confirmation, identify the restored tool clearly and update the setup record before release.
What to send for a replacement tooling review
Chinacovo press brake tooling is best suited to fabricators seeking standard or custom tools selected against part and machine specifications. Chinacovo manufactures punches, dies, forming tools and accessories; a replacement review still requires the actual clamping interface and working geometry, not only the machine brand.
Prepare this information before requesting a review:
- Finished-part drawing: bend angles, inside radius, flange geometry, tolerances and surface requirements.
- Material specification: grade, thickness and relevant condition or coating.
- Machine details: model, holder arrangement, clamping interface and available working space.
- Existing tooling: punch and die drawings, installed height, V-opening and segment layout.
- Process details: forming method, bend length, sequence and required clearances.
- Failure evidence: photographs, measured deviations, affected positions and the circumstances in which damage appeared.
Custom tooling addresses a defined geometry or interface requirement; it does not remove the need to verify loading, clearance and process suitability. Include the punch and holder information even when you are replacing only the lower die.
Prepare a tooling review
Match your part drawing, machine interface, material specification and required geometry.
Can you keep using a die that leaves marks?
Surface marks alone do not establish whether a die needs replacement. Stop and inspect the contact surfaces, then compare the marking with the drawing's surface requirements.
Material pickup or contamination requires a different response from chipping or a changed shoulder profile. Use an approved cleaning or maintenance method; uncontrolled abrasive work can change the geometry you are trying to preserve.
Does a low bend count mean a die is still safe?
A low bend count does not prove that a die is safe. Overloading, impact or an unsuitable setup can damage tooling before normal wear becomes the governing issue.
Treat bend count as exposure history, not a release criterion. Inspection and verification against the permitted application remain necessary after a suspected overload or handling incident.
FAQ
How many years should a press brake die last?
There is no universal service life in years for a press brake die. Base continued use on documented ratings, inspected condition, dimensional suitability and verified part results rather than calendar age.
How many bends can I make before replacing a die?
A bend count alone does not establish a replacement point. Record usage alongside material, loading and inspection findings, and follow any application-specific limits supplied by the tooling manufacturer.
What damage means I should stop using a press brake die?
Remove a die with cracks, chips or permanent deformation from service for qualified assessment. Do not compensate for suspected structural damage by changing pressure or program settings.
Can a worn press brake die be reground?
Regrinding requires a tool-specific engineering assessment before work begins. Confirm the permitted material removal, final profile, installed height, hardening considerations and operating limits with the manufacturer or qualified specialist.
Will replacing the die fix inconsistent bend angles?
Replacing the die is not a complete diagnosis for inconsistent bend angles. First check material variation, punch condition, seating, alignment, program settings and machine compensation alongside die geometry.
What does Chinacovo need to review a replacement die?
Chinacovo needs the finished-part drawing, machine interface, material grade, thickness and required geometry for a tooling review. Include the existing punch and die profiles, installed height, bend length and evidence of the problem.
One last thing
Do not discard the evidence when you remove a worn die. Photograph the affected area, identify its position in the setup and preserve the inspection record before segregating the tool.
For your 2026 maintenance log, connect that record to the part and setup that exposed the problem. A replacement restores suitable tooling; a documented cause helps you avoid repeating the same damage.
Related guides
- Press brake dies ranked by tonnage capacity
- Minimum bend radius by material and thickness
- Mixing press brake punches and dies from different brands
Open this COVO engineering guide · Browse press brake tooling · Request technical support